Thursday, January 20

Dark Chocolate M&M Chili Cookie Sandwiches with a side of OCD

Here is a little insight into what makes me, well, me. 


  I am mildly OCD...this has been downgraded I assure you. Nothing will make you loosen up like having kids. Instead of keeping a museum-like spotless home, my OCD shows itself in more subtle ways. For instance, when hanging pictures, it HAS to be straight and evenly spaced. If the level is even the slightest bit off, I rehang it. If you remove some of the frames from my walls, you will see sometimes up to 5 nail holes (not including the hole the nail currently occupies) from my attempts to get it straight. Now if these frames decide that they don't want to  hang straight, I will place a nail holding the corner in place that sets the frame right...instead of hanging crooked. 


Sound like not a big deal? Okay, I'll grant you that. 


So now we move into my area of the house. This is the ONLY area where I have supreme control over the state of cleanliness, what happens here, and can control who comes in this area. Which room am I talking about?


I heard someone say it! You up front. Say it again. That's right, the Kitchen!


  For me, having the rule of the kitchen is a huge deal and makes manageable the rest of the chaos that the girls cause in the rest of the house. At any time when the rest of the house is too noisy, too messy, too chaotic and I'm feeling overwhelmed I simply step into my kitchen and all is well. The counters can never be too clean; there are always dishes to be cleaned or put away; or I can simply bake. 


  When some people get anxious or uncomfortable or are in an awkward situation, they talk a lot or go out for a smoke or get jittery or need coffee or find some other outlet. I find I can't handle the awkwardness of some situations unless I am cleaning my kitchen. Most recently, I had some people over to our place and it was really awkward and uncomfortable for me. I spent about half of the time they were here in the kitchen. I cleaned. I found that once they had been here for a bit and I had occupied myself with the state of my room, I could deal with the situation. 


You're right, that's not really OCD. 


  Okay, how about this. IF Nate loads the dishwasher but doesn't run it and I come behind him to finish loading the dishwasher, I rearrange what he has done because it isn't the "right" way and it just doesn't feel right to me. I know, that sounds awful and overbearing and shows some issues. (Thank you for pointing that out.) 


  There are just some things that have to been done a certain way (or even a certain number of times) before it feels "right" to me. Brushing my teeth is another example. Or drying off after taking a shower--if I don't do it the same way I still feel wet, even though I may actually be completely dry. Anyhow, I think you get the point: I have mild OCD that is under control.


  Which actually brings me to my other reason for this post. Unprompted, I definitely wouldn't be sharing this admission. So Nate worked late last night and I didn't know what to do with myself. I put on some comfy clothes and ended up...where?...that's right, in the kitchen! :) I felt better and relaxed and enjoyed myself while whipping up some absolutely scrumptious cookie sandwiches. Hope you enjoy them as much as I did!! Oh yea, fair warning, I was lonesome so I took A LOT of pictures. :)


So I donned my Scooby Doo pajama pants, N.C. State hoodie, and pulled back my hair. Armed with a recipe as a good starting point, I set about the kitchen.
You know you like those pajama pants, don't lie. ;)


Dark Chocolate M&Ms Chili Cookies with White Chocolate Filling
recipe adapted from The Good Housekeeping Cookbook


      1 1/4 cup all-purpose flour
      1/2 tsp baking soda
      1/2 tsp salt
      1/2 tsp ground cinnamon
      1/2 tsp chili powder
      1/2 cup butter, softened
      1/2 cup packed dark brown sugar
      1/4 cup granulated sugar
      1 egg
      1 tsp vanilla extract
      1 1/4 cup dark chocolate M&Ms
      1/4 cup chopped hazelnuts


   Preheat oven to 375 degrees F. Line baking sheets with silicone baking sheet, or parchment paper. Set aside.


   In a mixing bowl, whisk together the flour, baking soda, salt, cinnamon, and chili powder until combined.


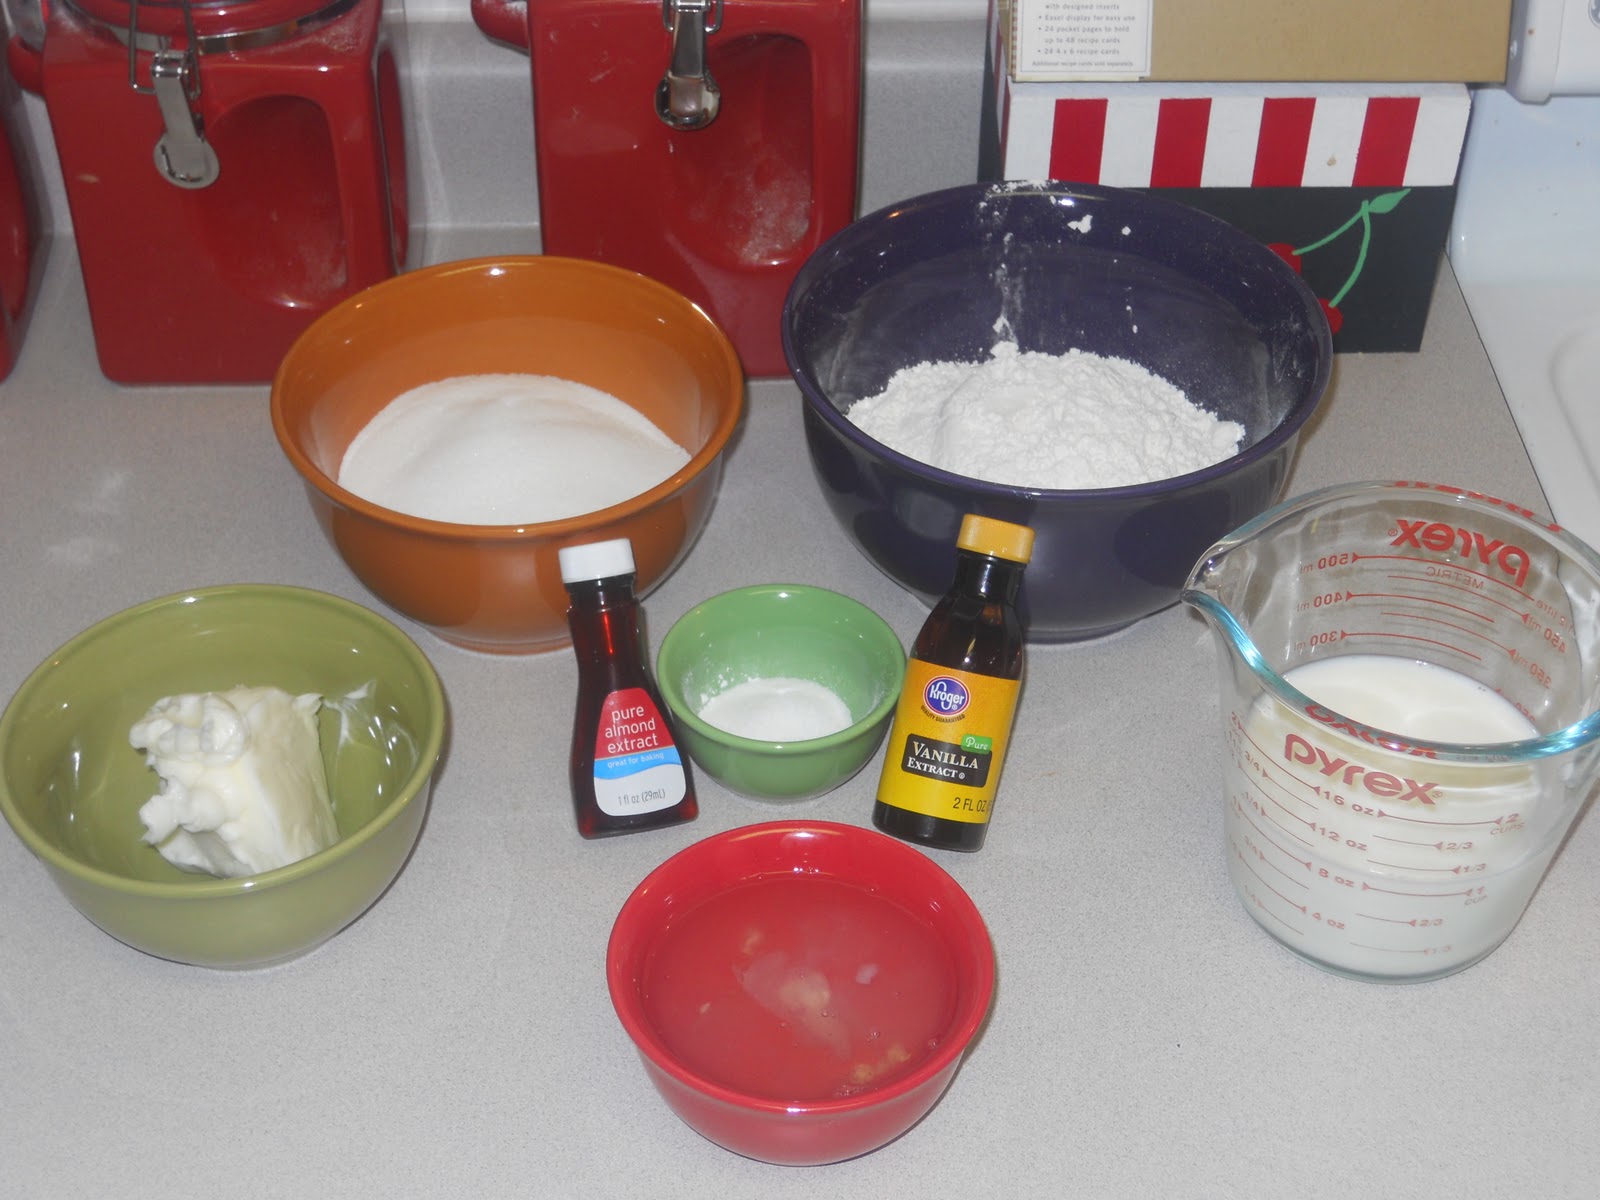
I decided to measure out the sugars and put them in a bowl first.


   In the bowl of a stand mixer, beat the butter until creamy. Beat in the dark brown sugar and the granulated sugar. Once light and fluffy, beat in the egg and vanilla extract. Beat at medium speed until well combined. 


   Turn the mixer down to low and slowly beat in the flour mixture half a cup at a time. Once all of the flour is incorporated, scrape down the sides of the bowl and stir in the M&Ms and hazelnuts.
Okay, okay. I give. Yes, these are unfinished M&Ms leftover from Christmas. C'mon though, what better way to use them up than by putting them in cookies???


   To drop them onto my baking sheet with the silicone mat, I used a glass of water and the 2 Tablespoon measuring spoon. 


Drop onto the prepared sheets and bake at 375 degrees F for 11 minutes. 


   Let stand for a minute or two on the sheets then transfer to wire racks to finish cooling.


What was my Peanut doing while I was baking? I'm sooo glad you asked, because it just so happens I took a picture. Actually, I took about 10 pictures with some close up, some of Peanut and the whole bed, some in black-and-white, and some in sepia tone. So I picked the one I liked best to answer your question. :)


While the cookies are cooling, we whip up the filling! Woohoo!


      8 oz white chocolate baking pieces
      1 cup unsalted butter, softened
      2 cup confectioners' sugar
      3 Tbsp whole milk


   In a microwave-safe bowl, melt the white pieces. Stir frequently so as not to over-heat. Set aside.


   In the bowl of a stand mixer, cream the butter. Once light and fluffy, beat in the remaining ingredients over low speed. When all of the ingredients have been incorporated, turn up speed. Beat for about 2 to 3 minutes.


 Let's make some cookie sandwiches!!


I decided leaving the frosting white was just no fun at all. So I searched through my cake decorating drawer at all of the food colorings I have. After much debate between teal and burgundy, I went with burgundy. I put a lot of coloring inside my make-shift pastry bag because I was looking more for fun coloring rather than a swirl effect. You'll remember this technique from the Snowflake Cupcakes from a couple of weeks ago.

After filling the Ziplock bag with frosting and snipping off one corner, I gave each cookie a good "swirl" on the bottom and then sandwiched both sides together.

I realize that may seem like a lot of icing to some, but it is really really REALLY good. You'll want that much too, I promise. Besides, big cookies need lots of frosting filling. ;)


 Here are two of the many pictures I took of my beautifully scrumptious FAHB-ulous Dark Chocolate M&M Chili Cookie Sandwiches with White Chocolate Butter Frosting!!! YUMM!!!


Tuesday, January 18

CrockPot Tuesdays: January 18th

    While walking up and down the many aisles of the grocery store on Friday, one of the many things that was on my list were dried beans. While looking for dried garbanzo beans, something else caught my eye--cranberry beans. I chuckled to myself then asked my four-year-old if we should give them a try. Of course she said no and of course they got tossed in the cart anyway. I'm not calling myself an all-knowing expert in the food world but I am familiar with a lot of the ingredients. Cranberry beans? Really? Since it is something I've never heard of, I did a little research courtesy of Google.


    First of all, in Italy they are called borlotti while New Englanders refer to them as shell beans. In the US, the beans are a fall crop, but are available most of the year as dried beans. The taste of the cranberry bean doesn't at all come close to its namesake. The flavor they hold is actually mild and chestnut-like. The beans are brown with cranberry-colored markings and tend to turn a light brown after being cooked--so if color is what you are looking for, you'd be better off with kidney beans. The cranberry bean is a great choice for recipes that call for legumes. Adding this bean provides great nutrition and extra protein. Using the label off of the bag of dried cranberry beans I used today, I found that per 1/4 cup of dry beans provides 9 grams of dietary fiber (which is 35% of your daily value), 8 grams of protein and 10% of your daily value of iron. That is all from only a quarter cup of dry beans! We can eat that in one bowl of soup! So let's add the whole bag to today's CrockPot!


I'll admit, I forgot to prep the beans last night before heading to bed. Luckily for me, and all other procrastinators out there, there is a "quick soak" technique that can be done about 90 minutes before it is time to add the beans to whichever recipe you may be using.


Rinse the beans and add them to 8 cups of water. Bring the pot to a rapid boil and boil for 2 minutes. Remove from heat, cover, and let stand for 1 hour. When the hour is up, drain the water from the pot and rinse beans again. 


Add them to the CrockPot.


Next comes two cans of broth. I used beef broth because I didn't have enough vegetable broth and didn't want to use chicken again. Next is the can of petite diced tomatoes, a can of Campbell's Bean with Bacon condensed soup, and about 1 cup of frozen peas and carrots. Stir it all together. Set the CrockPot insert back into the cooker and turn heat on to low. 


Now let's add in more flavor. 

Stir in about 1 teaspoon kosher salt, 1 teaspoon paprika, 1/4 teaspoon ground black pepper, 1/4 teaspoon garlic powder, 1/4 teaspoon onion powder, 1/4 teaspoon dried oregano, and 1/2 teaspoon nutmeg.

Cover and let it go!


~~~~~~~~~~~~~~~~~~~~~~~~~~~~~~~~~~~~~~~~~


    So of course everything can't always be a success. While this is not by any means a failure, I feel it is not a complete success since it is in need of further tweaking. So what is it about this stew that I am not completely happy with? I'm glad you asked. There weren't really any "mouth-popping" flavors that would make this dish stand out compared to others. There was a subtle smokey after taste thanks to the can of Campbell's Bean with Bacon condensed soup. The cranberry beans held up nicely in the 8 hours of cooking and had a nice bite to them. I could taste the tomatoes only because I knew they were there and thus looking for them. All-in-all the stew came together well, it is just in need of a little more TLC.

    What will I do differently next time? Thank you for asking! Let's see, next time I make this stew, I will first use 2 cans of diced tomatoes but NOT petite. Then I think I'll add a little extra of the veggie mix. The biggest change will come with the flavors: perhaps 1 1/2 tsp paprika, 1/2 tsp ground black pepper, 3/4 tsp garlic powder, 1/2 tsp onion powder, 1/2 tsp dried oregano, and finally 1 tsp ground nutmeg. Hopefully that will pack more of a punch! :)

Friday, January 14

Dessert of the Week-- Triple Chocolate Fudge Brownies

Is anyone else as tired as I am this week? I can't explain why, but I am just ready to lay in bed in some comfy clothes and sleeeeeeep. Anyway, aside from wanting sleep, I've also had an incurable craving for major chocolate. The cravings happen every so often and there is either a) never chocolate in the house or 2) nothing is chocolate-y enough. I've tried making my own Sea Salt Brownies before and, while they were good, they couldn't satiate that sweet tooth. I am proud to announce that a cure has been found and satisfies even the most severe of us chocoholics--I couldn't finish the piece I had cut for myself and Kyleigh didn't finish her piece either, that's how I know. :)

I went into the kitchen with the notion of wanting to use the different forms of chocolate I found in my baking cabinet. (I say found because I finally got around to cleaning it out.) I wanted to use one of the boxes of unsweetened baking chocolate, cocoa powder, and milk chocolate chunks--triple chocolate. Though the name given to this recipe may seem repetitive and redundant (yes, thank you all you English majors who have pointed out that both of those words mean the same thing--I did it on purpose :p) the texture of the brownie when it came out was very fudge-like., which happens to be how I like it best.


Triple Chocolate Fudge Brownies
      2 cups all-purpose flour
      1/2 tsp baking powder
      1 tsp table salt
      1/4 tsp chili powder
      4 Tbsp unsweetened cocoa powder
      1 cup granulated sugar
      1/2 cup packed dark brown sugar
      4 egg yolks
      5oz unsweetened baking chocolate squares
      14 oz can of sweetened condensed milk
      4 Tbsp unsalted butter, room temperature
      4 Tbsp half & half (do not use fat-free)
      2/3 of a bag of milk chocolate chunks
      1/4 tsp kosher salt, topping


  Preheat oven to 375 degrees F. Grease a square 9-inch baking pan and set aside.
  In a medium mixing bowl, whisk together the flour, baking powder, table salt, chili powder, and the cocoa powder. Whisk until it is well combined, and then set aside.


  In the bowl of a stand mixer, which is fitted with the whisk attachment, whisk egg yolks at medium speed until they are a soft yellow color and a creamy consistency. Set aside, but keep nearby.


  In a double-boiler, or a make-shift double-boiler: a metal mixing bowl set over a pot of boiling water but not touching the water, melt the unsweetened baking pieces over medium heat with the sweetened condensed milk. Use a whisk and stir constantly until smooth. Whisk in the butter, granulated sugar, and dark brown sugar until the butter is completely melted and the sugars are well incorporated--the texture will seem grainy or sandy.


  Remove the bowl from heat and stir in the flour mixture, egg yolks, and creamer. Stir until the flour mixture is completely combined.


  Pour the batter into the prepared pan. Spread so that it is even.
  Sprinkle the chocolate chunks onto top of the batter and use your hands to gently "squish" them down into the dough. Sprinkle the 1/4 teaspoon of kosher salt overtop.


  Bake at 375 degrees F for 20 minutes. Cool completely in the pan set on a wire rack.
  Cut up and enjoy with a tall glass of milk! Yumm!!


Tuesday, January 11

CrockPot Tuesdays: January 11th

Let's go vegetarian today, shall we? Oh yes, let's.

White Bean with Rice Stew


We'll begin with a can of chickpeas. Drain the can and rinse the beans, and because of personal preference, I shelled them. After that, they went into the CrockPot. Next came a can of Hunt's Fire Roasted Diced Tomatoes, followed by 2 cans of vegetable broth, 1/2 cup frozen chopped onions, 


3 peeled and cubed russet potatoes,


and 1 can drained and rinsed great white northern beans.


 Now it is time for some more flavors. Tossed in is: (all measurements are approximate because I don't really measure when I'm cooking) 1 tsp kosher salt, 1/2 tsp rubbed sage, 1/2 tsp dried thyme, 1/4 tsp black pepper, 1/2 tsp paprika, 1 tsp minced garlic, and 1 tsp lemon juice. 


With about 3 hours to go, I stirred in about a cup of cooked rice. 
 
After cooking on low heat for roughly 6 hours, now it is ready to eat! 

We added a dollop of Greek yogurt (yeah, I know, I seem obsessed with adding the yogurt to just about anything and everything) 
and shredded sharp cheddar cheese. 

Yumm!! Enjoy!

Friday, January 7

Fridays in January: Dessert of the Week


    I enjoyed doing the '25 Days of Christmas in Cookies' so much that I've decided to have the Fridays of every month be devoted to a theme that varies month-to-month. The Fridays of January are designated as the day for the Dessert of the Week. Yummy right? I thought so too. :)


~~~~~~~~~~~~~~~~~~~~~~~~~~~~~~~~~~~~~~~~~~~~


    Now, I live in the South. Snow isn't all that common in the wintertime...or, at least, it's not supposed to be. We have had snowfall before Christmas, the day after Christmas (which was around 6" or so), and now it is in the forecast for tonight (about an inch and we are under a Winter Weather Advisory; yes for an inch, I'm in the South remember) as well as Monday night into Tuesday equivalent to, if not slightly more than, what we had around Christmas. That may not sound like a lot, but flurries have also been forecasted a few more times in there that didn't amount to anything. For me, this is very unusual. Anyway, Kyleigh loves the idea of snow and so this week's dessert is for her: Snowflake Cupcakes.


The cupcakes are in the design of snowflakes.


For the cupcakes
Recipe: Silver White Cake
From The Good Housekeeping Cookbook, 125th Anniversary Edition

    2 cup cake flour, not self-rising
    2 tsp baking powder
    1 tsp salt
    4 large egg whites
    1 1/4 cup sugar
    1/2 cup vegetable shortening
    1 tsp vanilla extract
    1/4 tsp almond extract
    1 cup milk


  Preheat oven to 350 degrees F. Line muffin pans with paper cups and set aside.


  In a medium bowl, whisk to combine flour, baking powder, and salt. Set aside.


  In the bowl of a stand mixer, beat the egg whites at high speed until soft peaks form when the whisk attachment is lifted. 


Sprinkle in 1/4 cup sugar, 1 tablespoon at a time, beating until sugar has dissolved and the egg whites stand in stiff glossy peaks. Set aside.


  In another mixing bowl, beat the shortening and remaining 1 cup of sugar at low speed until blended. Increase speed to medium and then beat in both extracts. 


Reduce the speed back to low and beat in the flour mixture alternately with the milk. When doing this, begin and end with adding flour.


  Beat just until smooth and occasionally scrape down the sides of the bowl. 


Once smooth, gently fold in the beaten egg whites, a third at a time just until blended.


  Spoon the batter into muffin pans. 


Bake at 350 degrees F until a toothpick entered into the center of the cakes comes out clean, about 15 to 20 minutes. Cool in the pans that have been set on the wire racks for about 10 minutes. Turn cakes out onto the racks to finish cooling.


While waiting for the cupcakes to finish cooling down, it is time to whip up the frosting. I've decided to stick with using a recipe, as opposed to trying something completely new out, and try a frosting recipe from the same book.


White Chocolate Butter Frosting
    1 cup butter, softened
    2 cup confectioners' sugar
    6 oz white baking bars
    3 Tbsp milk


  In a bowl of a stand mixer, beat the butter, sugar, white chocolate, and milk at a low speed just until combined. Increase speed to high and beat until it is light and fluffy, about 2 minutes; scrape down the sides of the bowl frequently.


  Once the cupcakes have cooled, it is time to frost them. To get the pretty ice-blue swirls in the frosting, use a knife to "paint" streaks in the Ziplock bag (or pastry bag). Place the frosting into the bag and if using a Ziplock bag, snip off a corner. 


   Ice the cupcakes, moving in a circular motion. For the topping I had wanted to use a decorative sugar, but didn't have any. So we topped half of the cupcakes with the snowflake sprinkles. 


The other half we rolled the tops in granulated sugar.


The Snowflake Cupcakes turned out deliciously! The cakes are moist, spongy and light topped with a perfectly balanced sweet frosting! Yumm!!
Pin It

Foodie Blog Roll Ad