
For Tuesday, the kids were asked to bring in flowers for the teacher. I figured we had a couple of choices: a bouquet of flowers, a potted plant, or Kyleigh could paint a picture of flowers and use the tips of her fingers to make the petals. After talking to Kyleigh about it, we decided to go with a little plant. On Saturday, we went to Trader Joe's and we picked out two little begonias. (By the way, they were $2.49 each!)
We wanted a way to personalize the plant a little more, so Kyleigh and I each made a flower tag to place in the pot. Here's how it went.
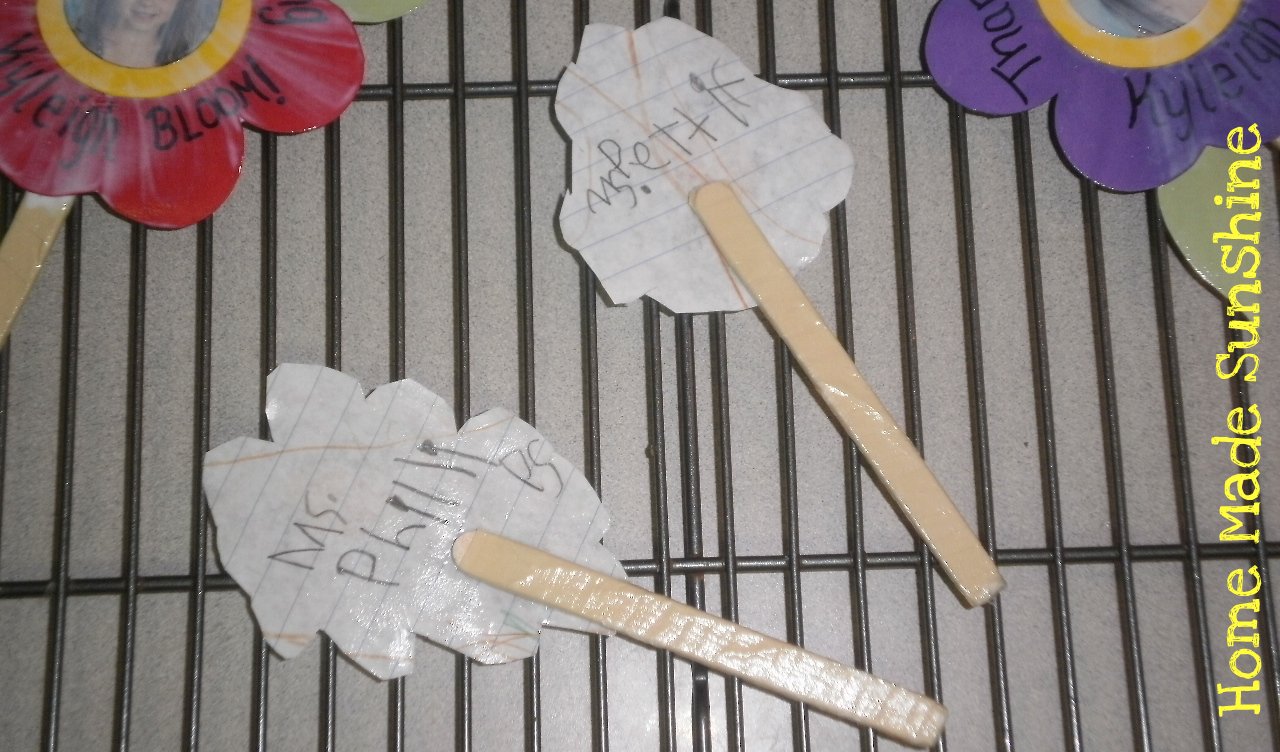
Kyleigh took some paper, drew out two flowers, colored them, then cut them out and wrote her teachers' names on the back of the flowers.
Then I got out the other materials I needed: wax paper, mod podge, a paint brush, masking tape, a permanent black marker, popsicle sticks, a shot glass to be used to make circles, scissors, two school pictures, and colored cardstock.


First thing to do, use the masking tape to wrap four popsicle sticks. Lay out the popsicle sticks on a sheet of wax paper and use the paint brush to "paint" one side of the popsicle stick with mod podge. After a few minutes when this layer has dried, flip the popsicle sticks over and "paint" the other side with a layer of mod podge.
Then, while the sticks are drying, it's time to begin making the flowers. I used the bottom of the shot glass to draw the circle around Kyleigh's face in her school pictures and the top of the shot glass to trace 4 yellow circles. I used the glass so that I knew the two sets of circles would fit neatly inside each other without needing to do lots of measuring and erasing. :)
Then I drew and cut out a flower (with the top circle of the glass traced out as the center) in purple then from the red cardstock. I used the green to make 4 little leaves.
Glue the picture onto one of the yellow circles. Then, using the mod podge, glue the yellow circle (with the picture) onto the center of the front of the flowers. Then glue two leaves onto the backs of each flower. Lay the flowers down on a sheet of wax paper (so that the glue from the leaves on the back won't stick) and then write on the front "Thanks for helping [your child's name] BLOOM!". Time to "paint" the front! Set it aside, still on the wax paper, and let it dry. Repeat with the second flower.

Grab the other two yellow circles, and write the school year on them. Then flip your first flower over (yes, it will probably still be a bit wet, but no worries since you are working on wax paper) and position your popsicle stick where you want it. Glue the stick in place. Then paint a layer of mod podge on the back side of the yellow circle and place it in the center of the back of the flower -- I made sure my circle covered the tip of the popsicle stick to help give it a little more stability. Paint a layer of mod podge over the entire back side of the flower. Repeat with second flower.

To make sure the entire flower stick would be dry by morning, I set it all out on a cooling rack overnight. And Kyleigh's were on the cooling rack too to dry. :) Her flowers got a nice coating of mod podge too.

In the morning, it was time to add them to the flower pots!

Kyleigh was definitely excited about how it all turned out!


No comments:
Post a Comment